
Navigation
Random Favorite Product
Head Lamp
My new must have when working under a car.
Advertisers
Side Projects
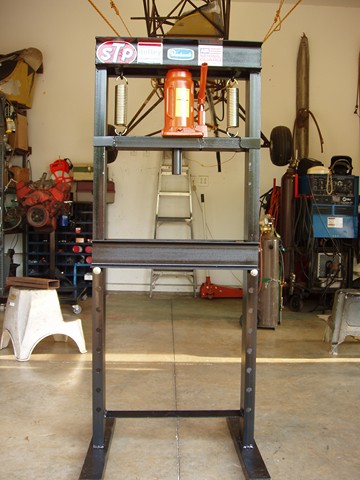
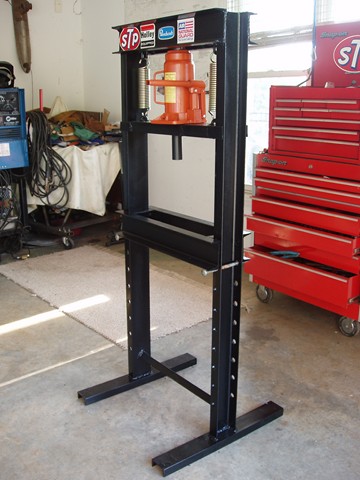
Homemade Hydraulic Press
To install the bushings on the control arm, I needed a hydraulic press. You can always buy one of course, but the more money you spend on tools, the less you have to spend on your Corvette. With that in mind, I went to the local scrap yard for metal. At thirty cents a pound, I filled the back of my truck with 25 feet of U-shaped metal beams. From there, I cut everything to its proper length and drilled a series of holes through the two vertical beams that are spaced 2.5" apart. This will give me an adjustable base so that I can press anything regardless of its size.
- Height - 5'
- Width - 2'
- Base - 2'
- Plunger - 5"
EDIT: Since the time I build this tool, technology and competition has greatly reduced the price of hydraulic presses. After running the numbers recently (2022), it appears that with parts alone, my expenses came out to about $75 cheaper than the average hydraulic press price on Amazon (See Here). Although I am proud of my tool and am confident that the build is both stronger and most definitely heavier, if I had to do it all again, I would spend the extra money and buy new. My time and yours as well is valuable and the 2+ days saved to avoid building this is well worth the extra few dollars.
For the hydraulics, I used a 20 Ton Bottle Jack from Harbor Freight. This should be enough pressure to install the bushings or anything else in the future. Luckily, I can always switch it out with a more powerful one if I ever need more pressure.

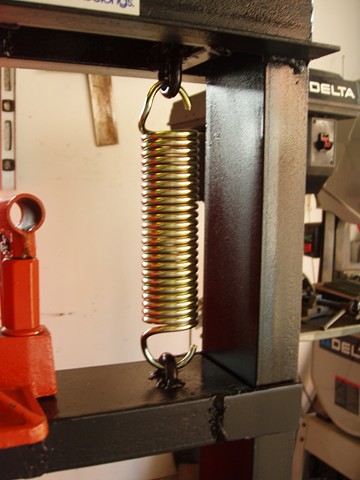
The springs are replacement springs for any 20 ton hydraulic press that I ordered from Northern Tools. To secure them, I welded a full chain link to the top bar and a half a link to the bottom bar. This gave me the perfect hook to mount the springs.
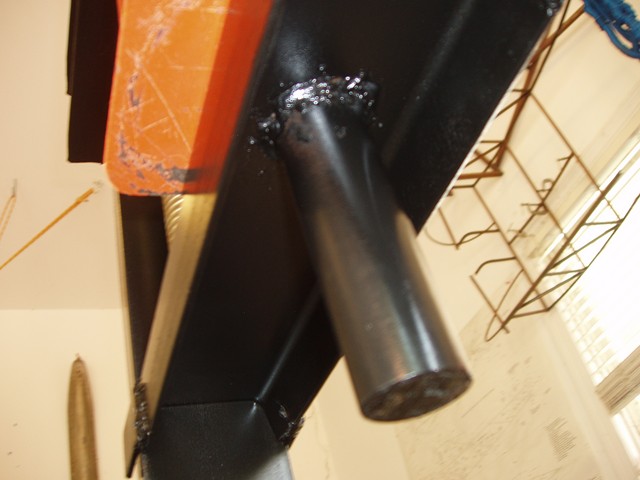
Before welding the plunger, I drilled a hole through the cross member. This way I could stick the plunger through the metal and weld it from the top and bottom to give it a stronger base.
To prevent the press from moving, I cut 1" off a pipe that was slightly wider in diameter than the top of the press. With this, the press will always be centered and secured in place.

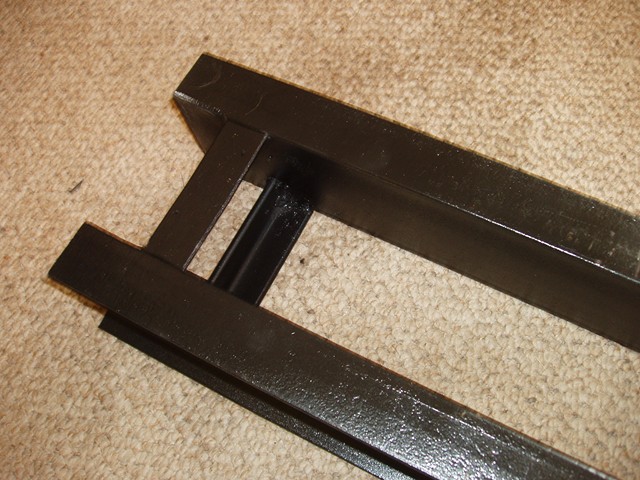
The last part to be made is the adjustable base platform. For this, I took two U channel beams measuring 2' long and connected them back to back with four pieces of scrap metal. Keep in mind when you are cutting your connecting pieces that they should be the width of the side bars (the ones you drilled holes in earlier) plus a quarter inch or so. This will give you a snug fit while at the same time allowing the base platform to slide freely up and down.
Another thing about is when to install this piece onto whole press. If the top support is not welded on yet, you can just slip the base platform over the top. (same concept applies from the other end if you didn't weld on the legs or the bottom support) If you got excited though and already welded up the entire stand (like me), you will have to place the newly fabricated base platform in vertically and then rotate it into place. This most likely won't fit the first time and will require trial and error of moving the four connecting braces around to rotate perfectly. It is a pain to figure out but on the plus side, I can remove the base platform whenever I want without cutting anything.
So far, I have only used this to install the control arm bushings but I am sure I will use it again further down this restoration with u-joints and pulling/installing bearings.
Questions:
What are the exact dimensions of the U-shaped beams?
Have a Question About This Article? Ask It Here!