Navigation
Random Favorite Product
Never Dull
Advertisers
1968 Corvette
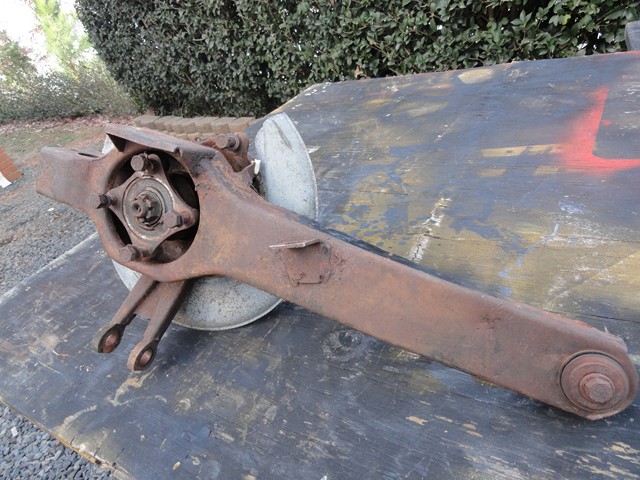
Trailing Arm Rebuild
Part 1
Now that the differential is completed, the only real obstacle left before having a rolling chassis is the trailing arm rebuild. I questioned whether I should send them out or do it myself. The nice thing about sending them out is that they would be finished sooner and usually come with a warranty. Also, there aren't any expensive tools to buy. The negative is that you don't know the how much care and attention to detail is being put into your trailing arm. Because of this and the fact that I am always looking for an excuse to buy new tools, I decided rebuild my own trailing arms.
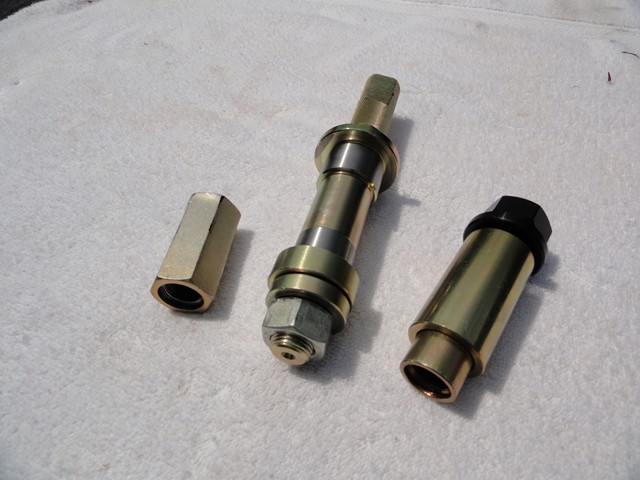
I am not in any way a professional at rebuilding trailing arms so this article is intended for educational purposes only. In this article, I show exactly everything that I did without leaving even the smallest detail. I bought three unique tools from Mid America; spindle knocker, spindle installation tool, and the set up tool. The majority of my hardware was bought from Van Steel.
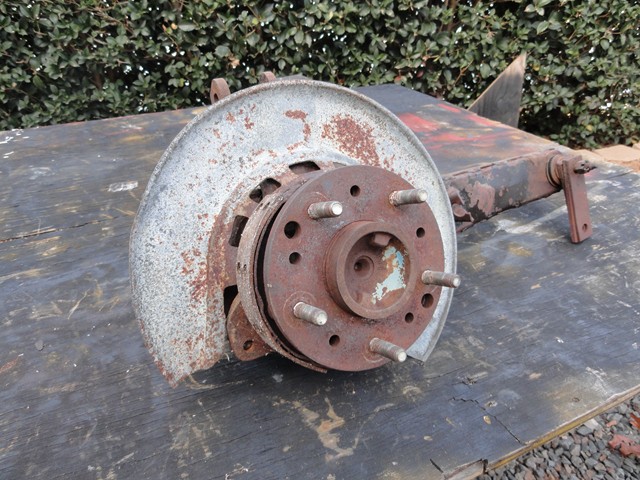
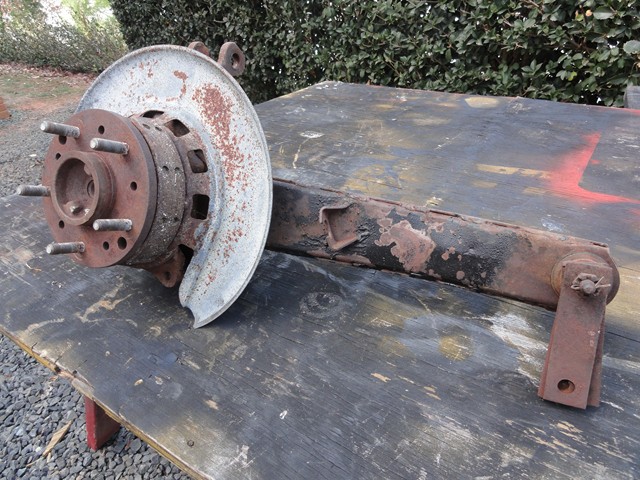
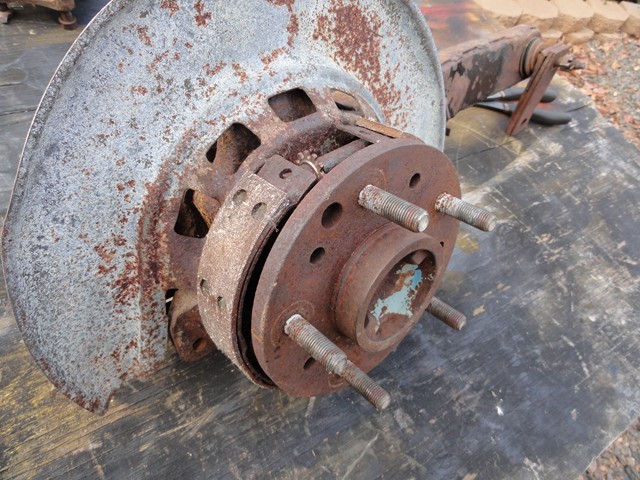
Here are a few pictures before disassembly.
Some specialty tools. I ended up not using the one on the far right called the Spindle installation tool.
First, I removed the cotter pin, nut, and washer. The impact gun did a good job of removing the nut.
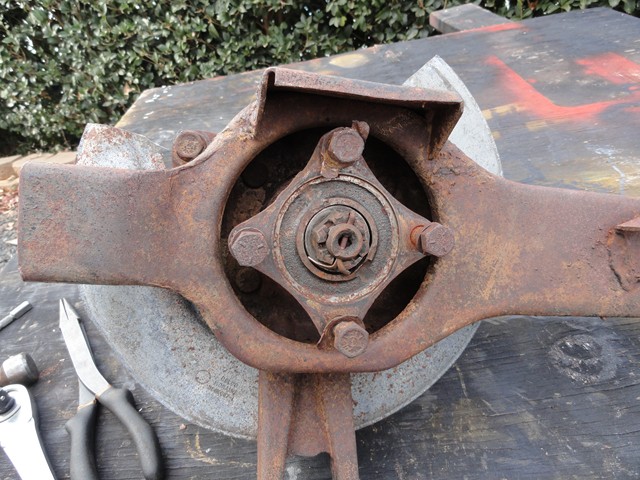
Once the nut was removed, the spindle flange was somewhat stuck on there. Since the studs were going to be replaced anyway, I placed the trailing arm in the vice and used a crow bar to remove the flange.

Next, I proceeded to remove the parking brake. This was easy with the absence of the top/bottom springs as well as the hold down springs.
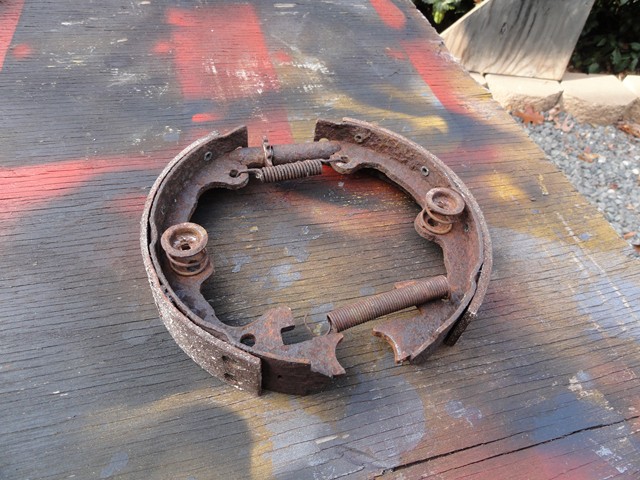
Unfortunately it looks like someone has been here already. Guess the mechanic or whoever could not figure out how to get the parking brake actuating lever through the backing plate without cutting it. I hope there aren't any other surprises down the road.
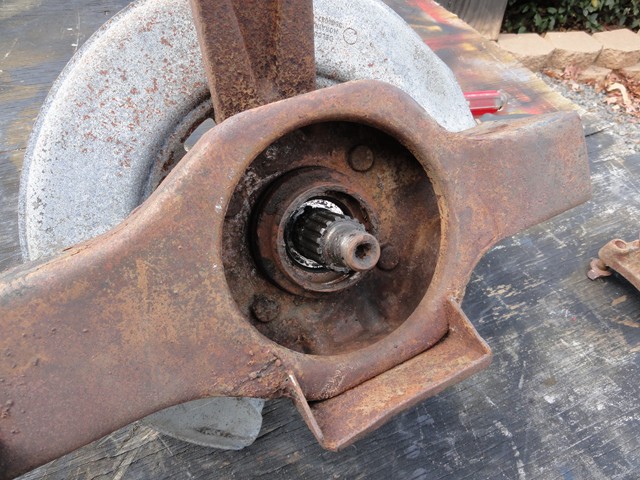
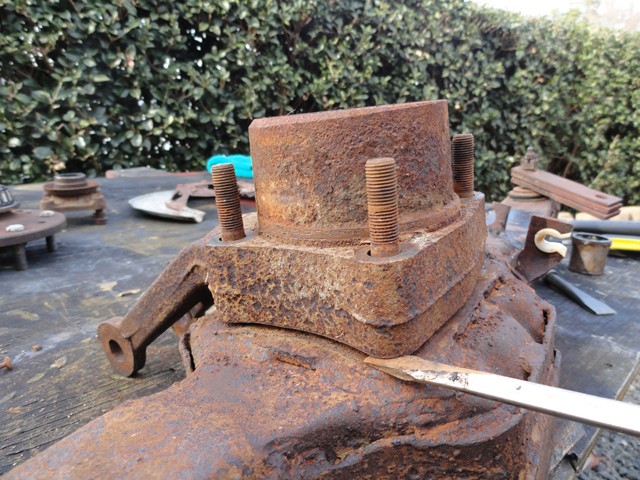
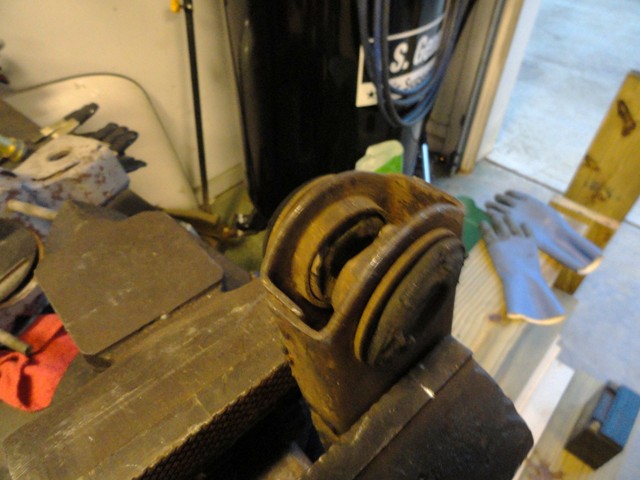
With the parking brake out of the way, I focused on removing the spindle. I placed the bearing spindle support in the vise and screwed the spindle knocker on. The spindle knocker is a piece of metal that is threaded to screw over the spindle. It is there to protect the threads while attempting to pound the spindle out.

With a few taps of the hammer, the spindle came free.
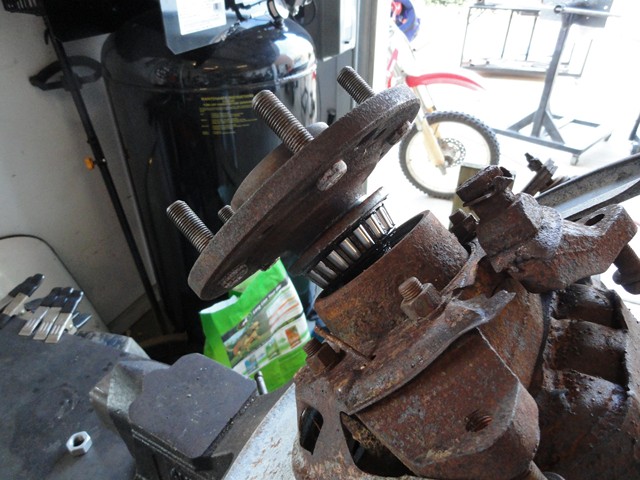
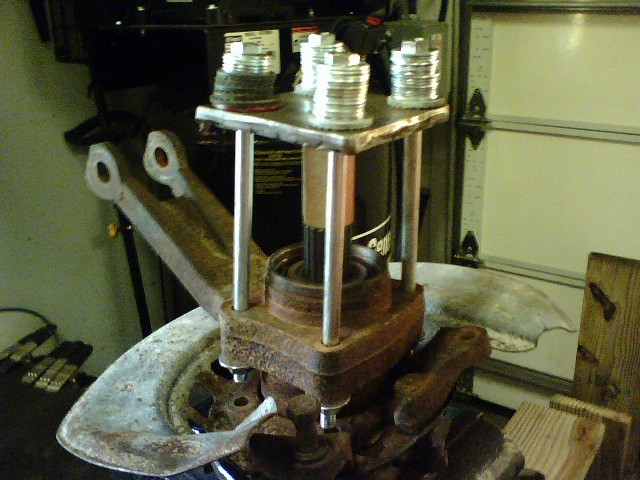
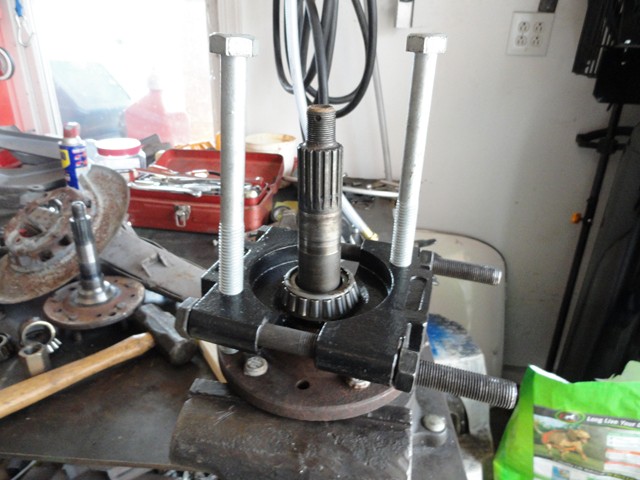
Now this isn't always going to be the case. Even though I did the same method with the other trailing arm, I couldn't get the spindle free. So it was time to make a new tool. If you remember from a previous article about installing u-joints in the half shafts, the half shafts flange required a metal plate mounted to them to prevent the flange from bending during the u-joint installation. I took the metal plate and drilled the four holes slightly larger. Then I bought four 8 inch bolts since 6 inches would be two short. To get the bolts to fit, I stacked each with a pile of washers. Next, I installed the spindle knocker to protect the thread. With nuts and washers installed on the bottom, I evenly tightened each bolt which in turn pulled the wheel bearing spindle support from the spindle until it came free. The first two pictures are the half shaft tool and the third is the wheel bearing support puller.
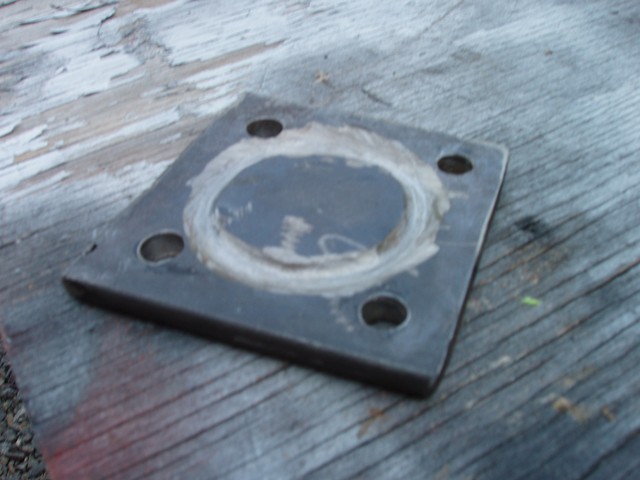
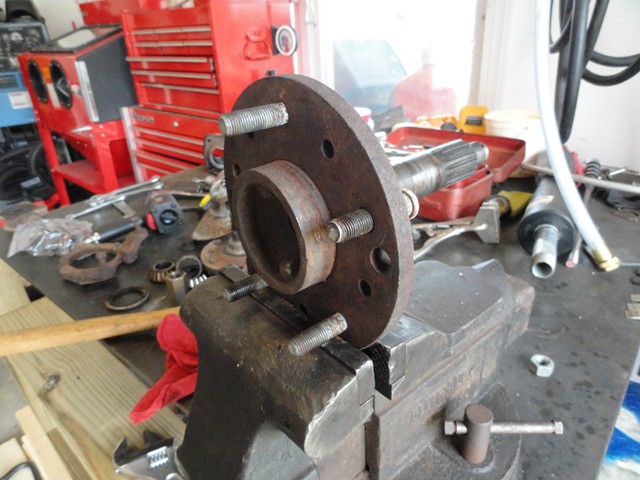
With the spindle out of the way, I continued with the disassembly by removing the dust shield, bearing, inner seal, shim, and spacer.
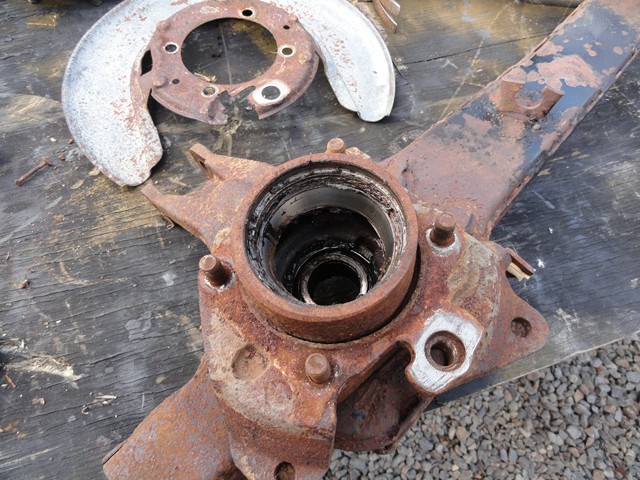
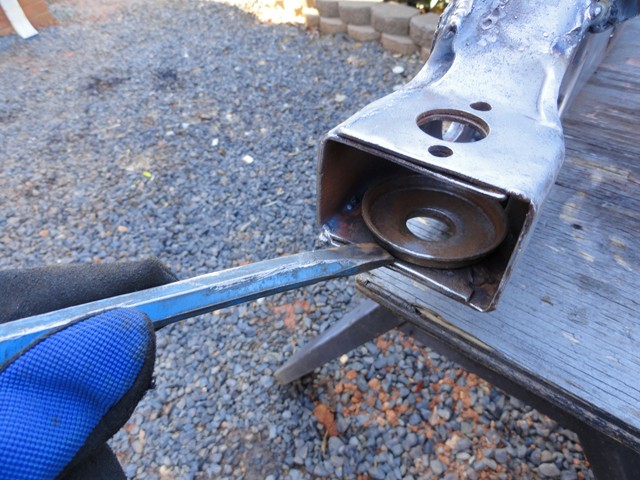
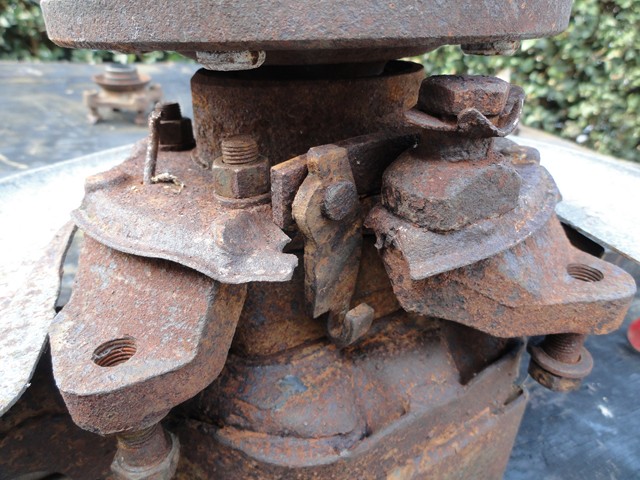
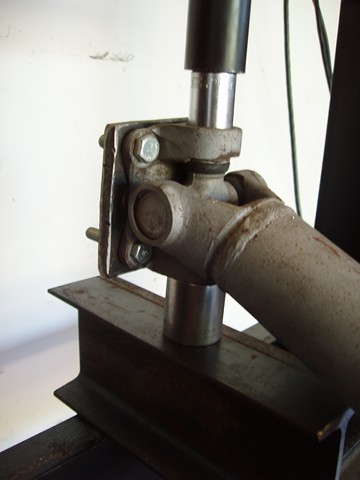
Next, I separated and removed the caliper mounting bracket from the top of the wheel bearing spindle support.

Once the caliper mounting bracket became free, I removed the spindle support the same way.
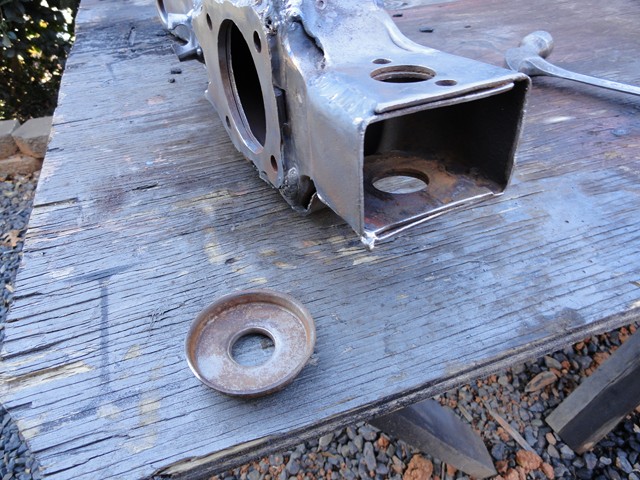
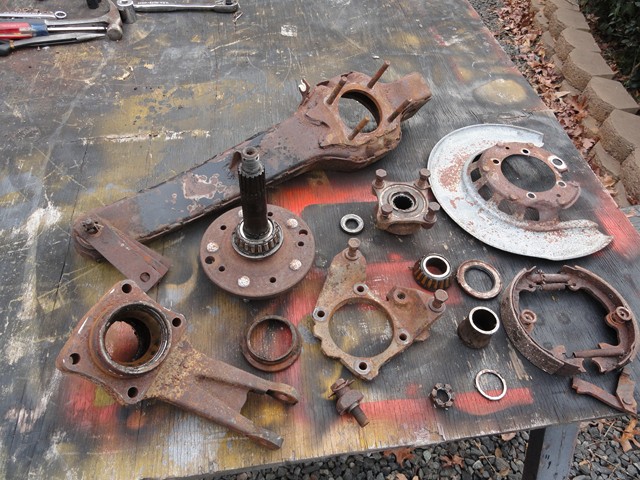
Here is a laid out view of all that has been removed so far.
The next part to remove is the outer bearing. They make a special tool for this but it can run up to around $140. Since I already spent a pretty penny on the other tools necessary for this job I decided to rough it and figure another way around it. I ended up using the bearing splitter that I bought while rebuilding the differential. I believe it cost somewhere around $30. With plenty of use with the differential and some other projects, I accidently bent the main bolts that hold the metal pieces together. This is not a problem holding the pieces of metal together, but unfortunately with even the slightest bend, the bolts will not screw into the holes on top. I ended up retapping the thread to fit some larger bolts from Lowes. Now that I have a working puller again I placed it around the bearing and screwed the vertical bolts down evenly. This in turn pulled the splitter up and the bearing with it. The only problem I had with this is that the ends of the vertical bolts became somewhat compressed or mushroomed which makes the bolts unable to be removed fully without cutting or grinding the end of the bolt. Not a problem though.
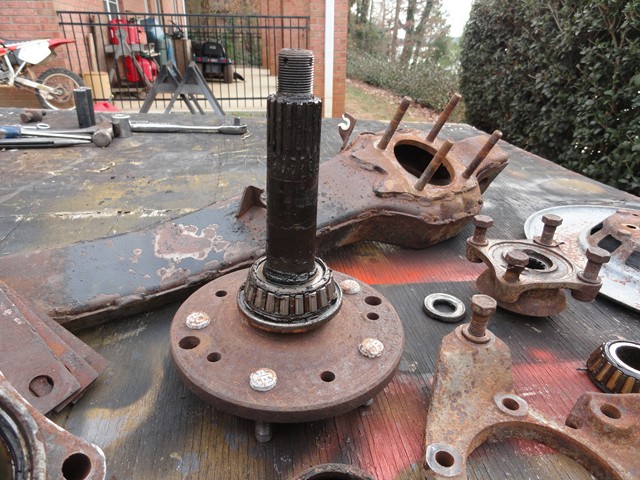
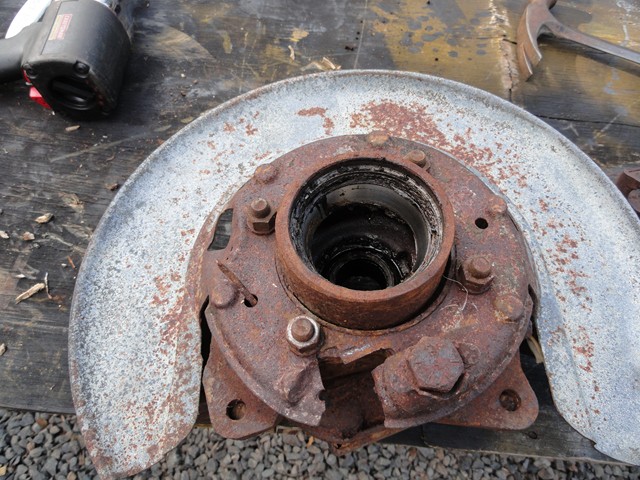
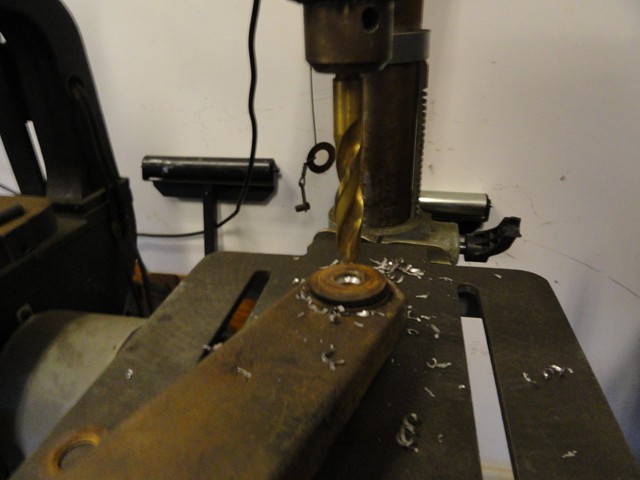
After the bearing and seal was removed, I placed the spindle securely in the vise and tapped the lug nut studs out.
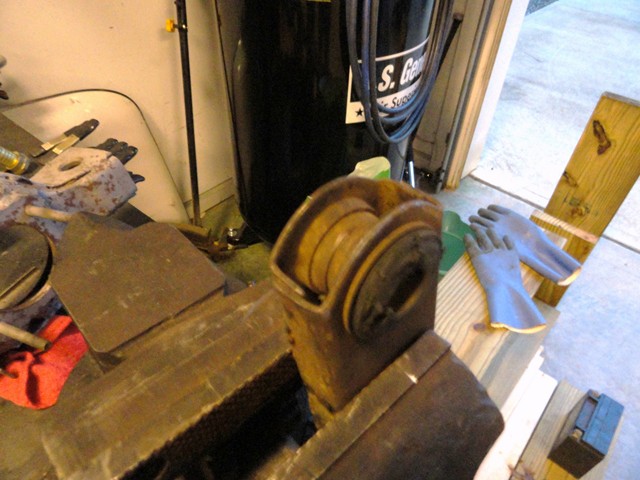
Once the flare was drilled out, I gave it a few pops with the air hammer to remove the sleeve.
Since there is no longer anything holding the two bushings together, I used a chisel to remove the bushings and the metal pieces that once surrounded the bushings.
Now with almost everything removed, the next step is to clean, sand, and paint everything. With all the small parts the blast cabinet came in handy. After I removed the races in the bearing support housing, I gently used a wire wheel to truly clean it out well.
Next I used a chisel to remove the support of the leaf spring bushing.