
Navigation
Random Favorite Product
Head Lamp
My new must have when working under a car.
Advertisers
1968 Corvette
Front Suspension Assembly and Installation
Now that the control arms are ready to go, I can start reassembling the front suspension. The first thing I did was attach the control arms and torque them to specifications. The lower A-arm's two bolts that screw into the metal block are torqued to 50 ft-lbs and the other bolt that is located on the back side of the front cross member is torque to 60 ft-lbs. I placed the bushing bolts on but didn't torque them until the weight of the body was on the frame. Once I get the body on I will torque them to 50 ft-lbs.
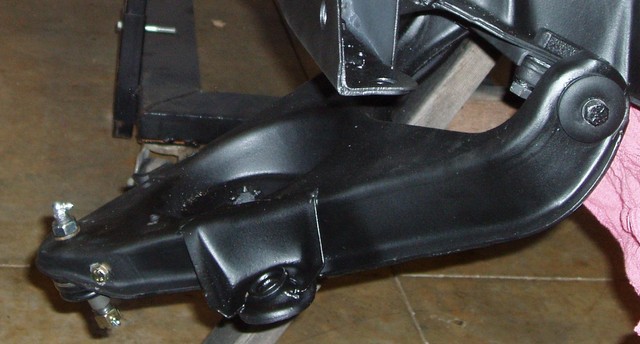
The upper control arms bolts are torqued to 50ft-lbs but before I tighten them, I added the marked shims. This should make it a little easier when it comes to alignment time. Just like the lower control arms, I tightened the bushing bolts but didn't torque it for the same reason. These bolts will be torque to 40ft-lbs once the body is on.
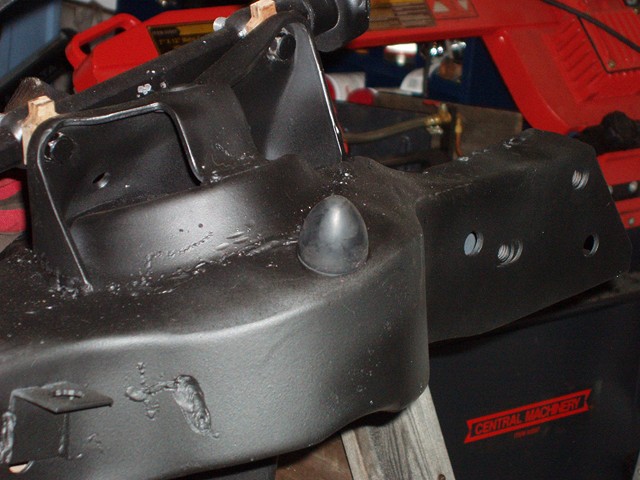
Next, I installed the upper control arm rubber bumpers on the frame. I used WD-40 before installing to make it a little easier.
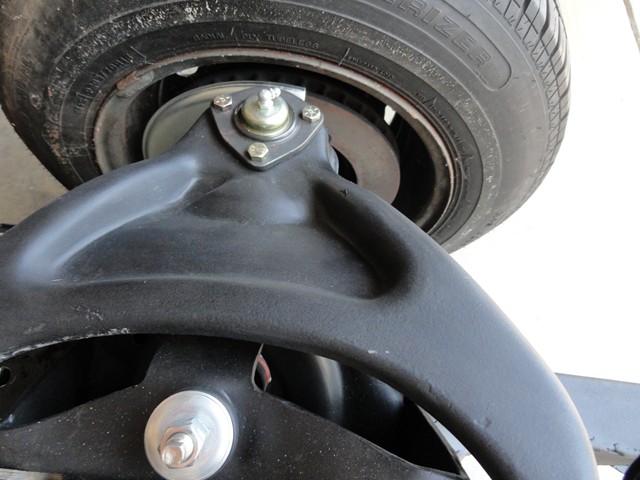
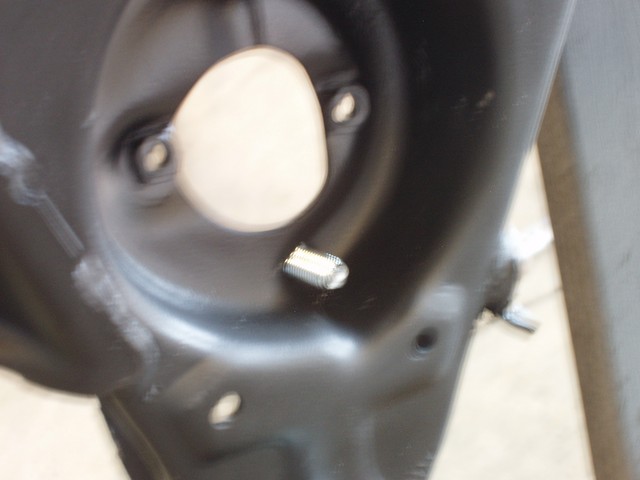
The last step I did before installing the springs was adding the spindle to the lower control arm. The castle nut was torque to 70ft-lbs followed by the cotter pin.

Now the fun part: Coil Spring Installation. These are the original springs so there was no cutting involved before installing them. To prevent one side from being higher than the other it has to be aligned. According to The Assembly Manual it says you should be able to see the cut end of the coil spring through the drain hole. To align the spring up so it would not move past the drain hole, I placed a bolt through the bottom then pressed the spring up against it. Once everything is torque down with the spring in place, I will remove the bolt. With the pressure from the spring, it will not move over or past the drain hole.
I personally thought this would be a 5 to 10 minute process. I figured once the springs are compressed everything would come together like clockwork. Unfortunately, that wasn't the case. I bought a 2 Piece Coil Spring Compressor by Sunex but quickly determined that because of how deep the spring goes into the frame that external spring compressor would not work because of clearance with the frame and lower A-arm.

So since the external spring compressor would not work, I bought an Internal Spring Compressor by S&G. This worked effectively, but because of the clearance in-between the frame and lower A-arm, the spring compressor would not compress enough to get the spring small enough to fit in its place. I have heard of others using internal spring compressor to install the spring, but I just didn't have any luck with this one.
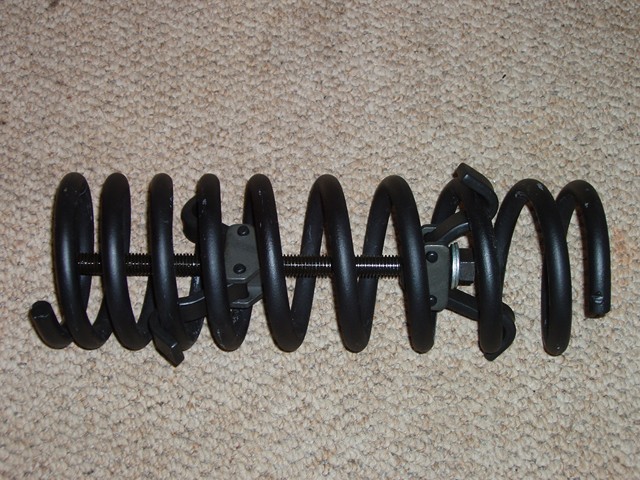
After becoming extremely frustrated, I decided to use the spring compressor from a different angle. I placed one piece of the spring compressor on the outside of the lower control arm. Then I place the threaded part through the center to connect to the other half of the spring compressor. By doing this, it gave me the extra 2 to 3 inches I needed that was blocked by the indentation of in the lower control arm. Keep in mind, this entire time the spring has been secured by a chain just in case anything were to slip and the spring were to break loose.
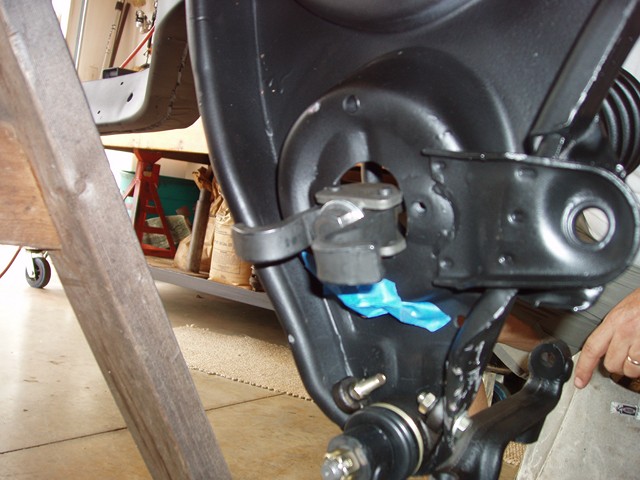
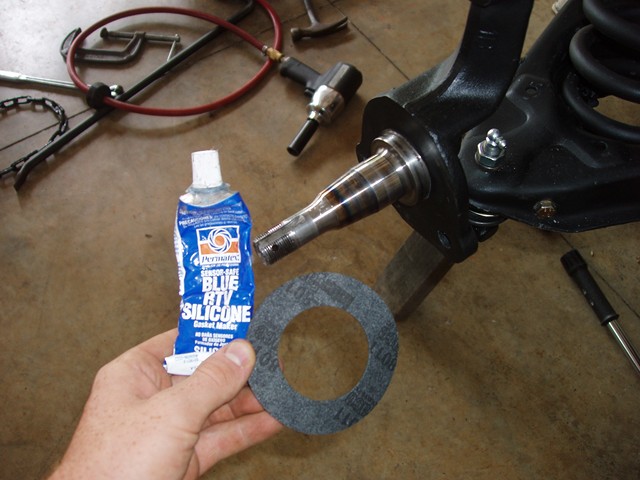
Unfortunately the spring compressor reduced the spring about a half a inch short of being able to place the upper ball joint bolt on to secure the spindle in place. To make up the difference I had two people sit on the frame as I lifted the lower control arm using a shop jack until I was able to attach the bolt on safely. The next step is applying RTV to one side of the dust shield gasket.
After that, the dust shields, caliper bracket, and steering knuckle were installed.
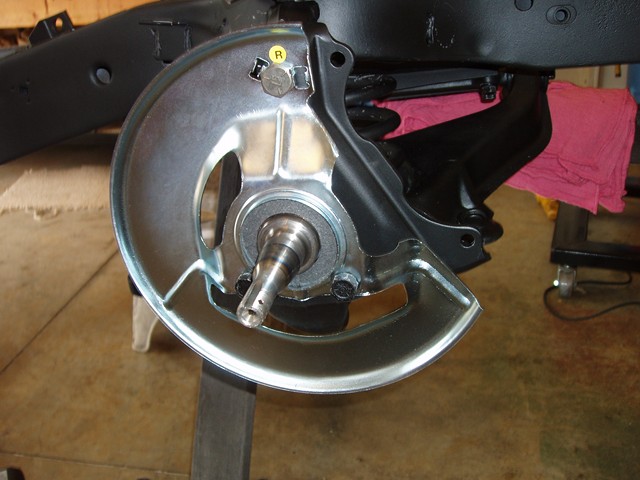
Now the rotors and wheels can go back on. For now, I am not going to leave the bearings dry and not mess with the grease. I will replace the bearing and pack them later down the restoration.
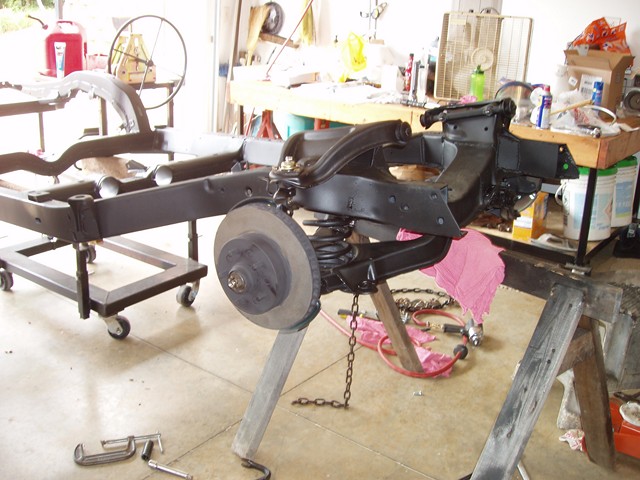
Now that it is partially rolling again, I will set it aside in storage while I rebuild the rear suspension and differential.
Have a Question About This Article? Ask It Here!