Navigation
Random Favorite Product
Fast Orange
A Must Have for Every Shop
Advertisers
1968 Corvette
Trailing Arm Rebuild
Part 2
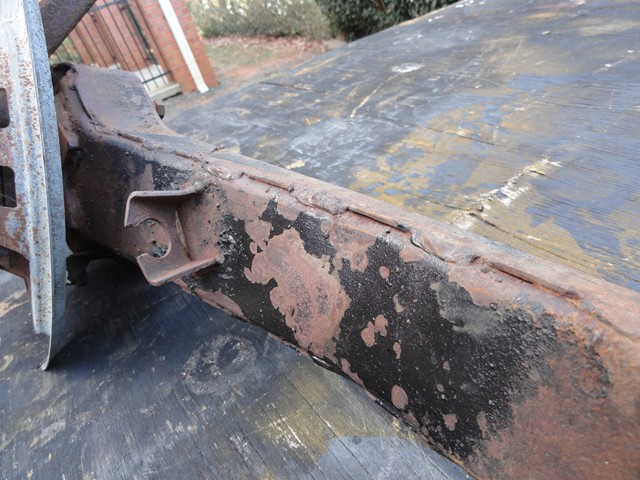
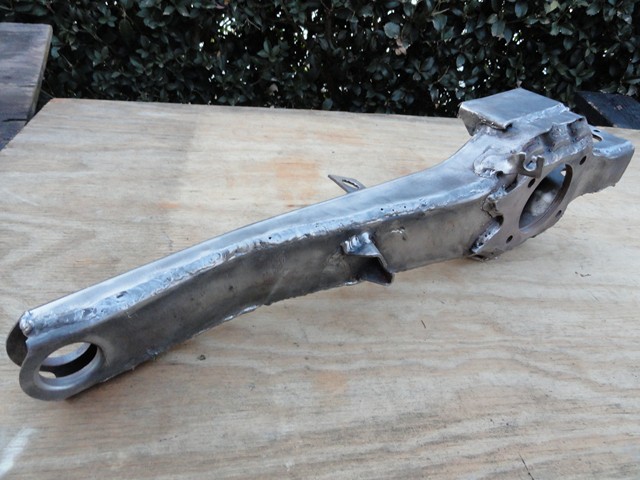
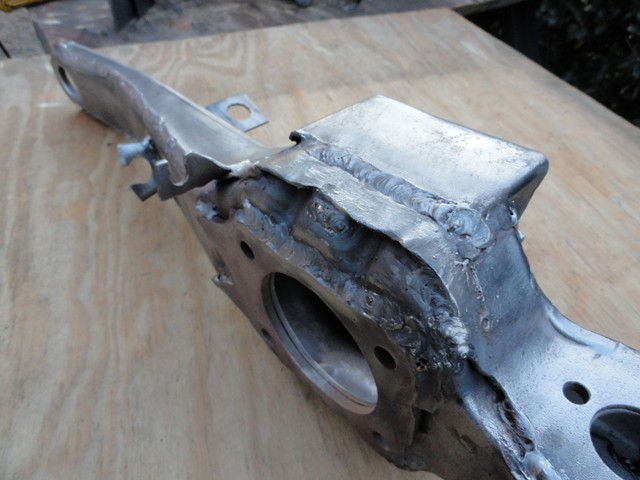
After everything had been either sand blasted or wire wheeled, I moved on to improving the trailing arms by adding full welds. Just like the frame, the trailing arms are also spot welded. This isn't a big deal at all, but while I am there I might as well make it as strong as possible. I was careful to work in small sections to prevent them from any warping.
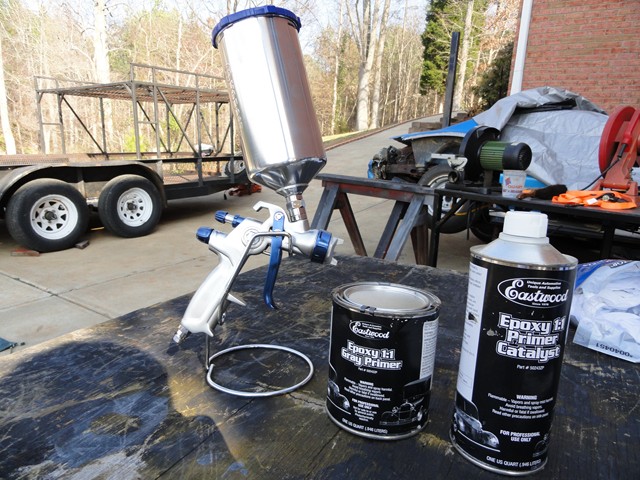
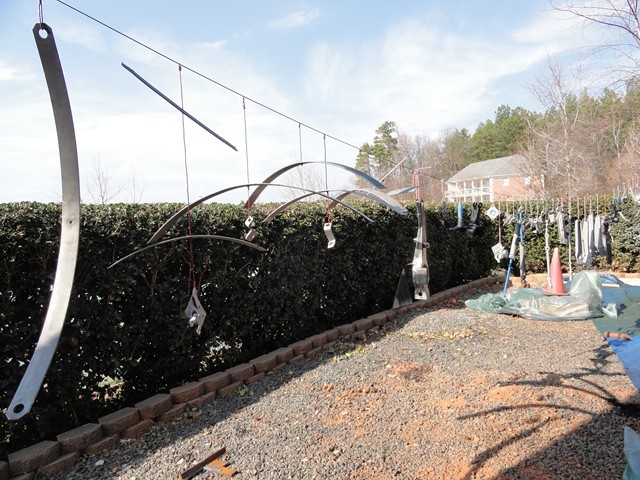
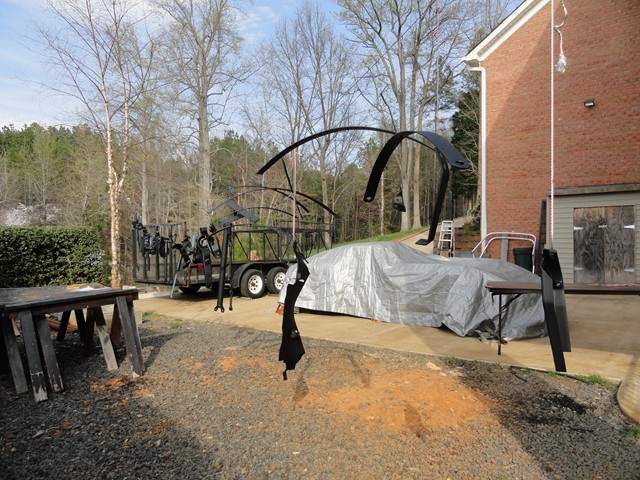
Since the full welds on the side and ends are the only modification I am going to do, I can move on to painting. I used the same paint that I used on the frame. It is a two part ceramic epoxy satin black paint sold from Eastwood. I do enjoy the durability and looks of this paint but it definitely isn't the cheapest paint on the market. I had a few other parts to paint at the time so everything was out to be sprayed. Once I finished painting everything and a day or so had past for it to fully cure, I removed the parts making sure to label them so that the spindles or other parts could not be mixed up or switch sides.
I made a mistake when painting the spindle. I forgot that the rotor run out has to be within a certain spec and that anything between the rotor and spindle like primer/ paint can mess up the measurement. So I will have to remove the paint off the front surface later when I am setting the rotor run out.

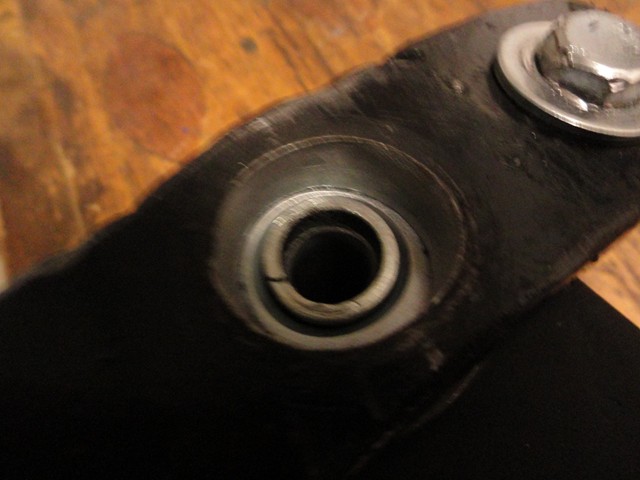
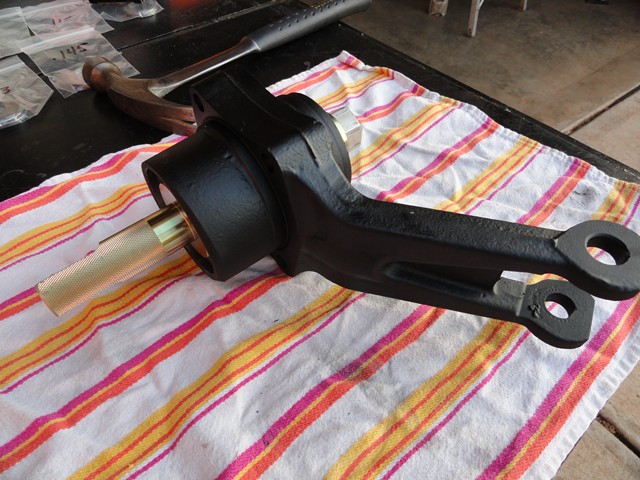
Now that everything is painted, I can move on to the fun part of reassembly. I first started out by installing the new races in the bearing support housing. Before installation, I cleaned the bearing housing once again in case I missed anything the first time. The last thing I want is for the races not to sit properly because something is in its way.
The kit from Van Steel includes Timken bearings and races as well as a shim kit. The shim kit includes a new spacer as well as different size shims to get a snug fit.
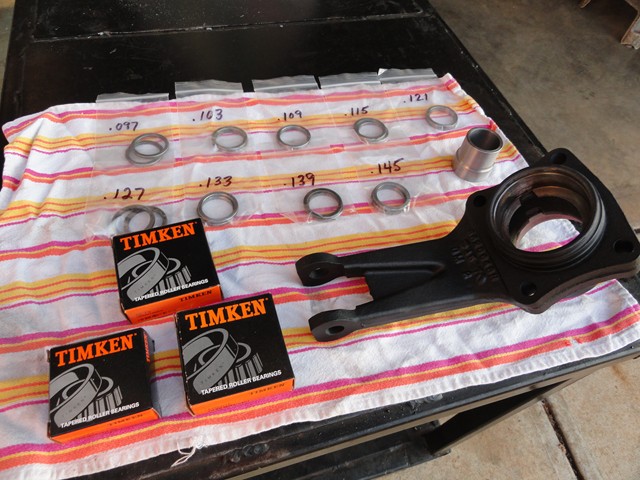
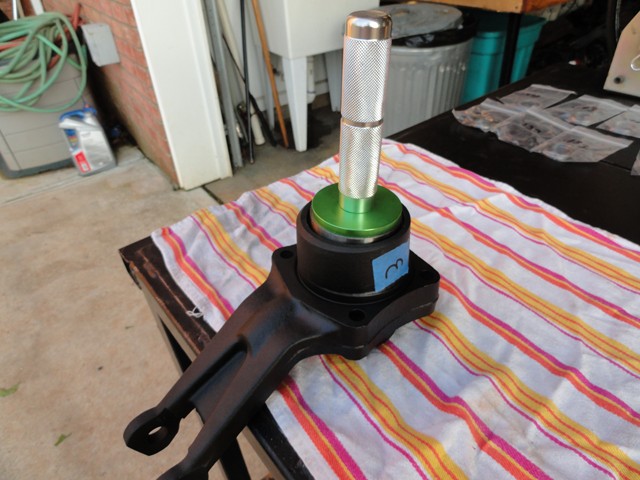
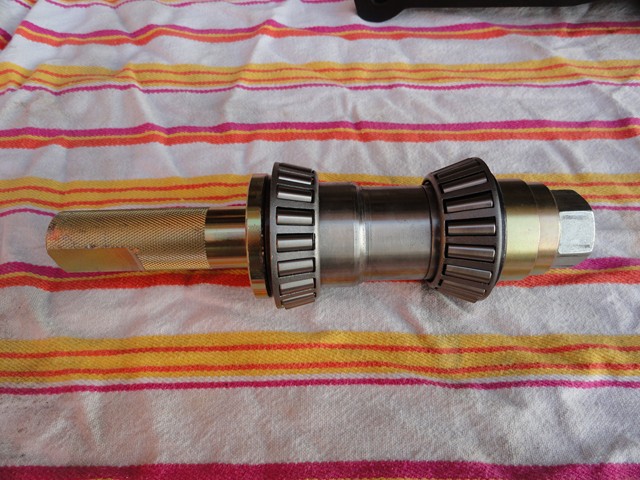
The tool seen on the left and in the picture above is the set up tool. What it does is mimics the spindle in the way of mounting the bearing so that one can find the exact size shim they need without going through the hassle of messing with or damaging the original spindle. Here is what it look like when it is in the bearing housing. There is the outer bearing, spacer, shim, inner bearing, and a few washers and a nut to hold it all together.
When first starting out to find the perfect size shim, I started out with the biggest one in the kit: .145. I placed it after the spacer and then assembled the rest of the tool in housing. I made sure to lightly oil the bearings to prevent from damaging the bearing or the races when installed.
Next, I held the bottom of the tool with the bench vise and torque the nut to 100ft lb.

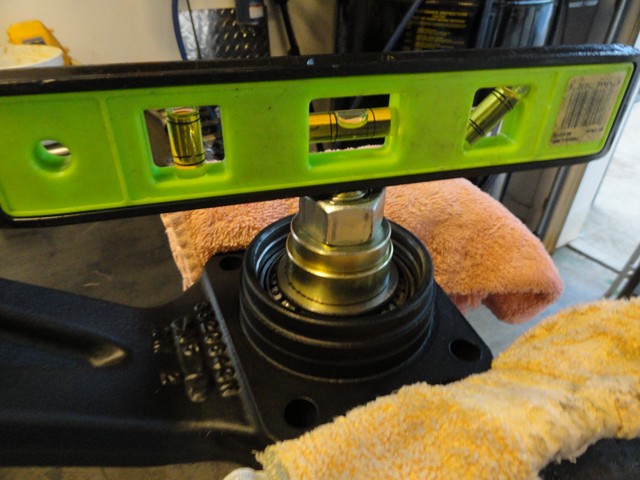
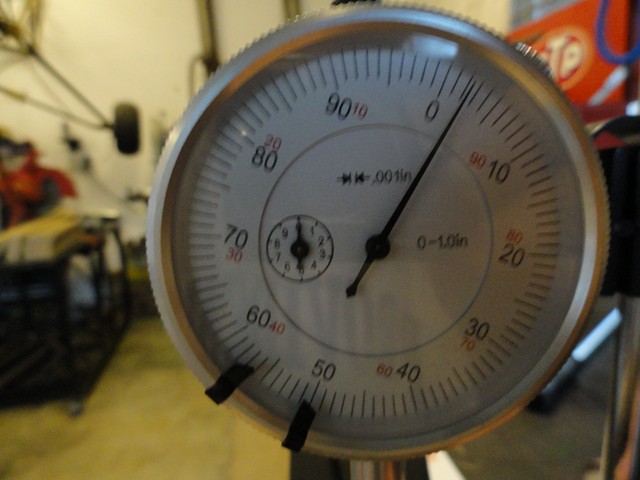
Then I used the vise to hold the housing while I checked the end play with the dial indicator. GM said that it should be between .001-.008 but to me that seems like a big difference. A .008 would feel extremely loose in comparison to a .001 so I am aiming for below .0025 and higher than .0015 just in case the grease affects the end play when added.
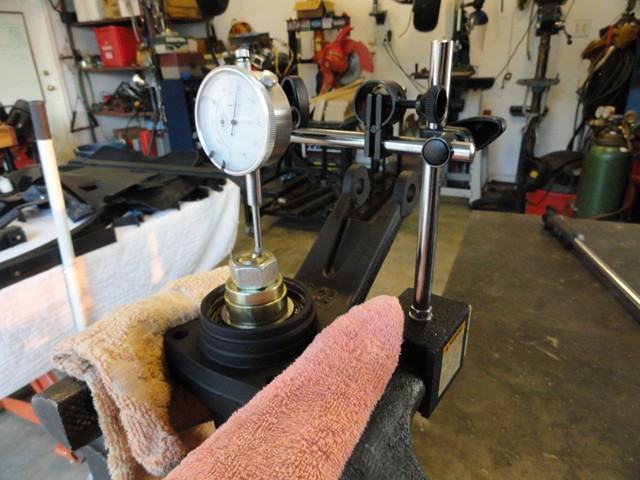
I am not sure if it would make a difference in end play but I made sure that the bearing housing was level in the vise.
The reason I started out with the thickest shim is to get a better idea of what size I would need. I started out with the .145 shim and end play came up with .0325. So if I were to take away .0325 I would have zero play but I am wanting around .002 so I will need to remove close to .30 instead. I could have taken the gamble and dropped down to a .115 shim but I wanted to play it safe and moved down to the .121 shim instead in case I measured the end play wrong. With this shim, the end play was 8.5. Getting closer, but still loose so I dropped down to a .115 shim. With the .115 shim the end play came up at very slightly under .0025. I am happy with that so I am not going to go any further with this shim.
Luckily the passenger shim went together well without having to sand the shim but that wasn't the case with the driver side. When I put the .127 shim in, the end play came up to be .006. I couldn't drop down to the .121 shim because that would mean there would be no end play. That meant that I had to sand the .127 shim down to a .123. To do that, I placed a grinding wheel on a flat surface and dragged the shim along the side of it. I went in both direction and every twenty rotations switch my grip on it to lessen the chances of making it uneven. I constantly checked the size of it until I got it close to .123. After that I used very fine sand paper to smooth it out and give it back its shine. And just like that, I have a .123 size shim.

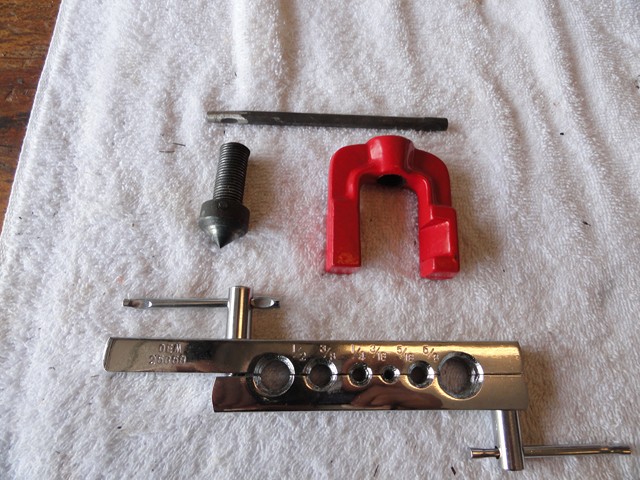
Now that the bearings are ready to go I can move on with the actual trailing arm. Before the trailing arms are loaded down during the assembly process, I decided to install the bushings. With rubber bushings, the rubber has to be compressed in order for the bushing's sleeve to flare and held the two ends firmly together. So once again it is time to make a new tool. I took two scrap pieces of metal and drilled a hold on both ends. On one of the pieces I drilled a 15/16th hole for the flaring tool to go into. From there, I bought a cheap flaring kit from Auto Zone and removed the plunger to flare the bushing sleeve. They do sell a trailing arm tool to compress and flare the sleeve but I decided that I could do without and save the $50 or so for another day.
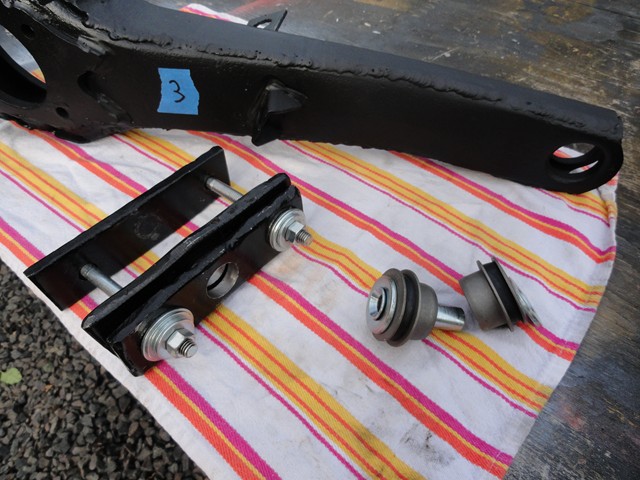
I did make a mistake the first time I used it though. My top piece of metal with the hole in it was not wide enough so when compressed, it bent and also bent the washers below. To strengthen it, I used a wider piece of metal below it to give it a stronger foundation.
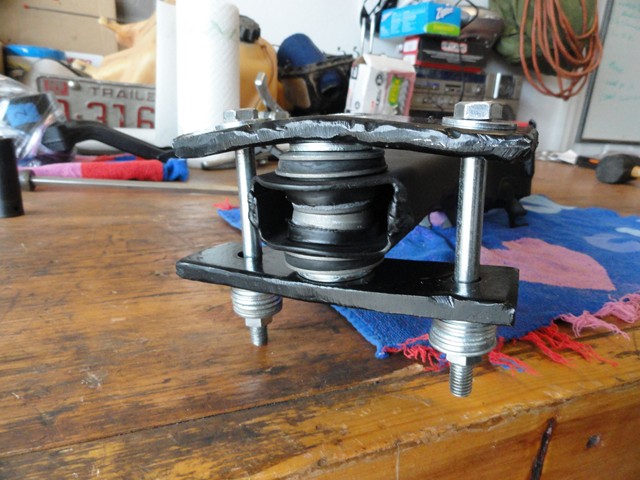
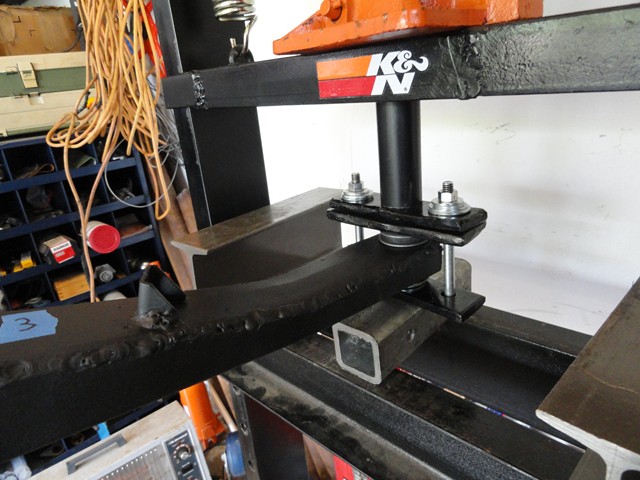
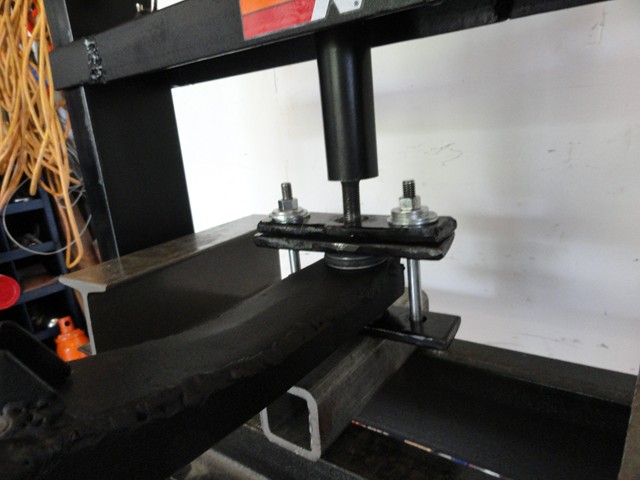
Once the tool is in position with the washers and sleeve installed, the bushings are ready to be compressed. I used the hydraulic press just because it is faster but I am sure that tightening the bolts would work as well. With the bushing compressed, I used the flaring plunger and the hydraulic press to slowly flare the end of the sleeve. I have heard of others using a hammer instead of the press but I figure this would distribute the pressure better. And just like that, the sleeve is flared and the bushings are held tightly together.
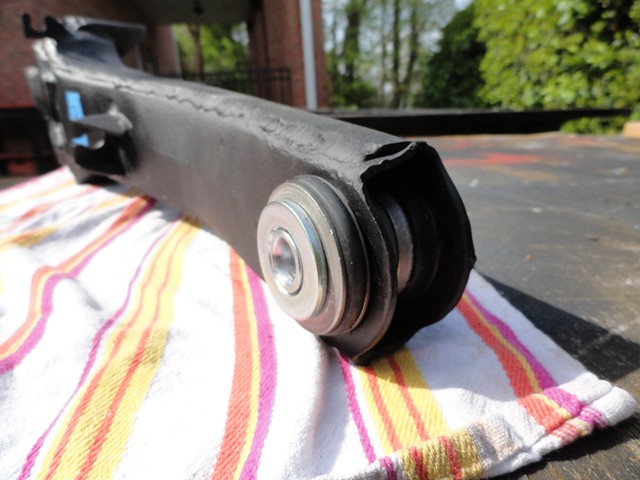
The first time I tried to flare the bushings; I went a little too fast and cracked the sleeve. Even though it did hold the two bushings together fine I didn't want that type of work on my restoration. I ended up drilling it out and ordering a new sleeve for close to $6. I have heard of people having problems with different length of the sleeves from different companies so I made sure to buy the new sleeve from the same company I bought the trailing arm kit from so there would not be any conflicting parts.