
Navigation
Random Favorite Product
Never Dull
Advertisers
Side Projects
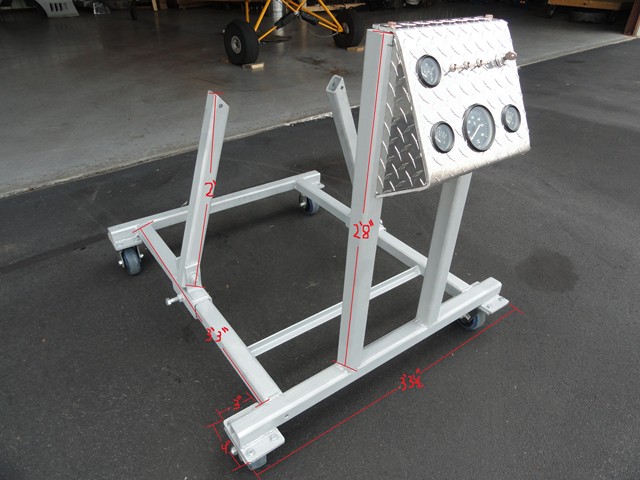
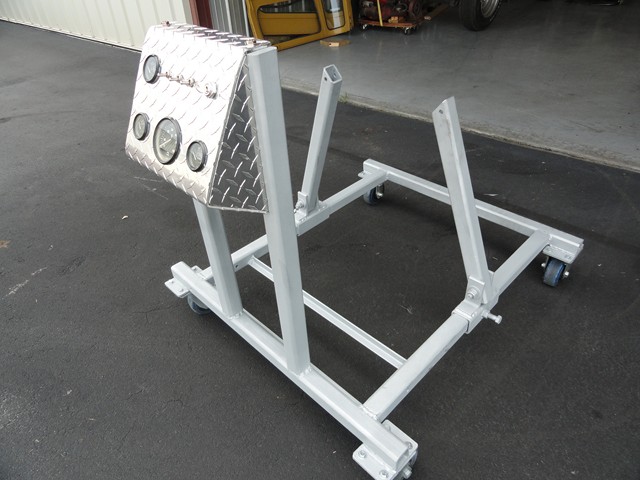
Engine Test Stand
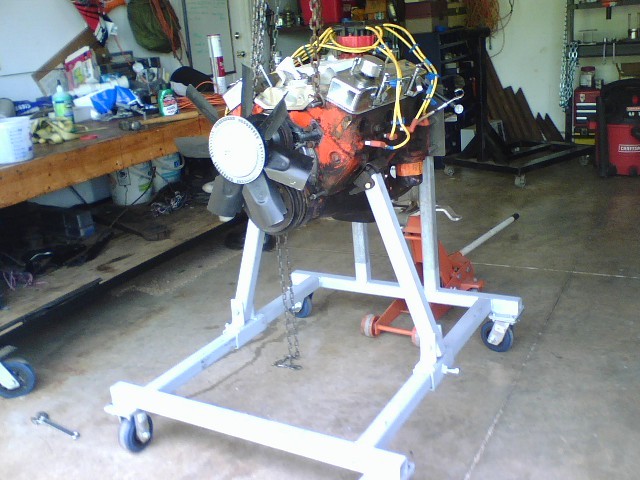
As part of my 1968 Corvette Restoration, I needed a place to store and test run my 327/350hp engine. The last thing that I would want is an unforeseen oil leak all over the freshly restored body and chassis. For this reason, I decided to build an engine test stand to operate the engine prior to installation. Plus, it is a good way to keep an engine from sitting too long without it being run.
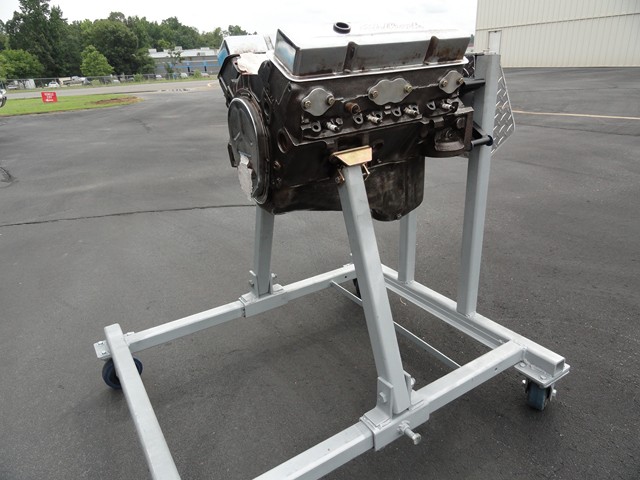
Overall, I really like how this project turned out. It is very mobile yet sturdy and the diamond plate control panel looks stunning. I have already removed the engine on the 1976 Corvette once but if I have to do it again for some reason, I am really happy that I have this stand available.
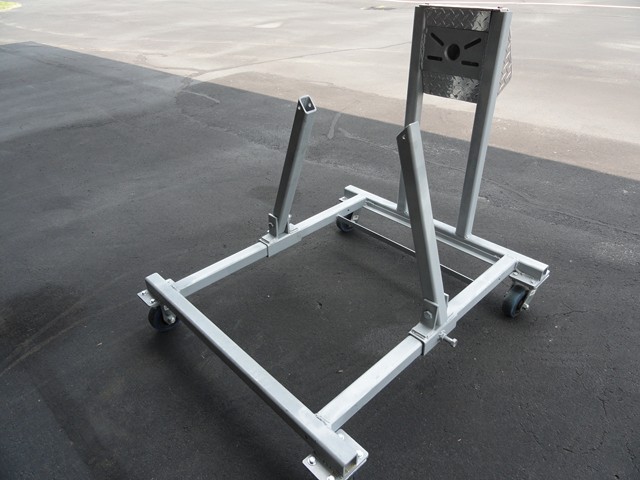
Here are a few pictures of the almost completed engine test stand. I will update this article later once I build the mount for the radiator but I wanted to have an engine hook up first to make sure I do not make the radiator mount too high or low.
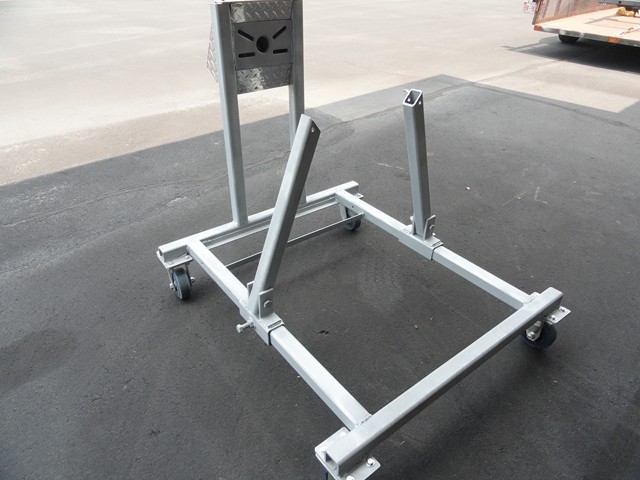
I first started out laying everything out and deciding on a design.
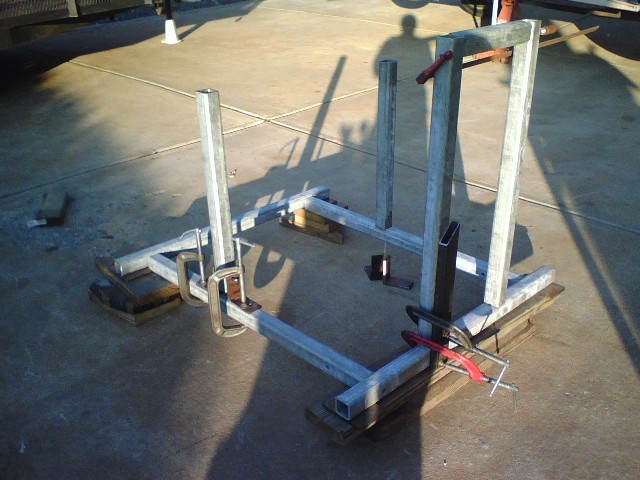
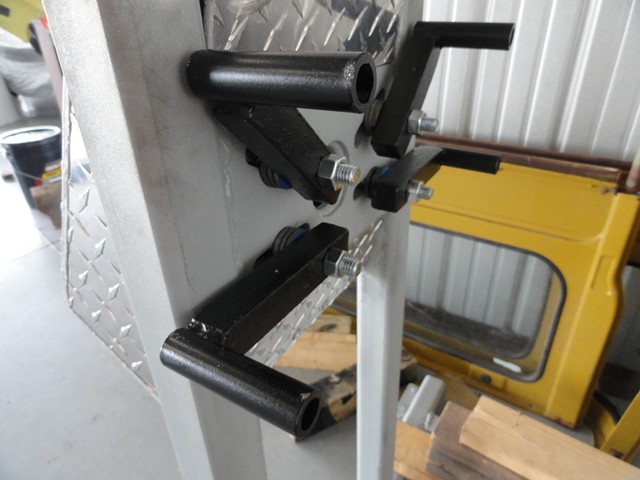
Before welding all the pieces together, I slid a larger square over the 2" by 2" to make it compatible for different sizes of engines. I cut two pieces off a strip of angle iron and drilled a hole so that the arms can move. The nut welded on the side is for locking the engine in place but I do not think I am going to have any problems with it moving.

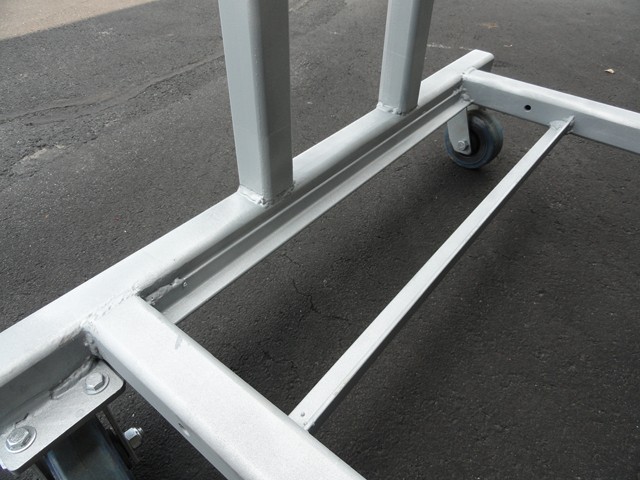
I welded four precut metal rectangles that I bought at the scrap yard as a base to mount the casters to. This way I didn't have to weld them to the stand. The casters I used were from Harbor Freight and can hold 350 lb each, good thing because the stand alone is weighing quite a bit.
This might be a little over kill using ¼ inch steel but the price was right.

 I installed a rack on the back using 1x1in angle iron to hold the battery and gas tank.
In order to find out where to place the rear mounting plate, I test mounted the engine on the stand. Once I determined where to install the plate, I welded four long welds on the sides to give it the most strength possible. With the slits in the mounting plate, I can move the arms to adjust for different size engines.
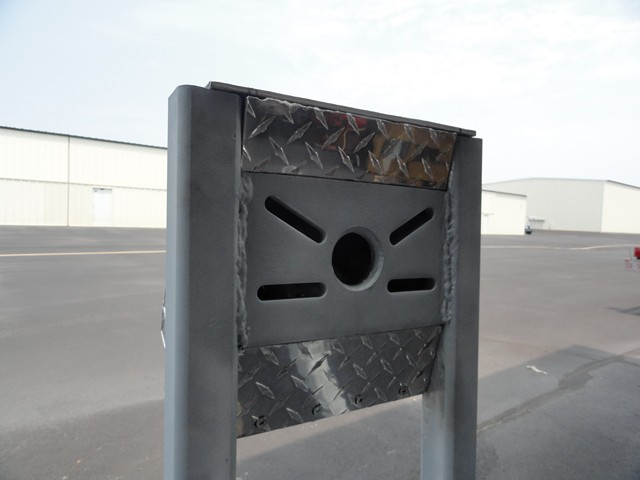
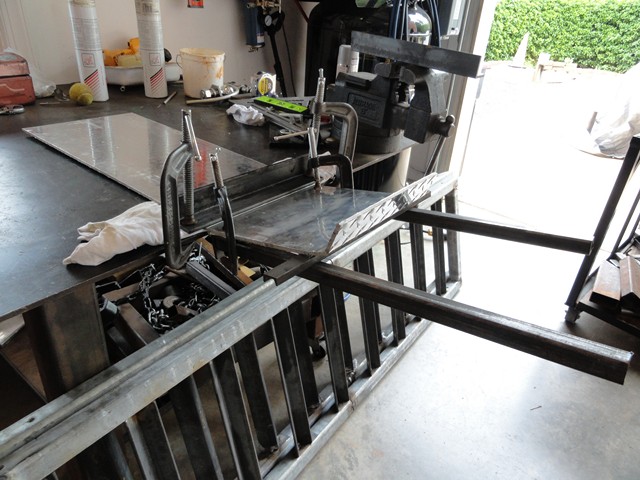
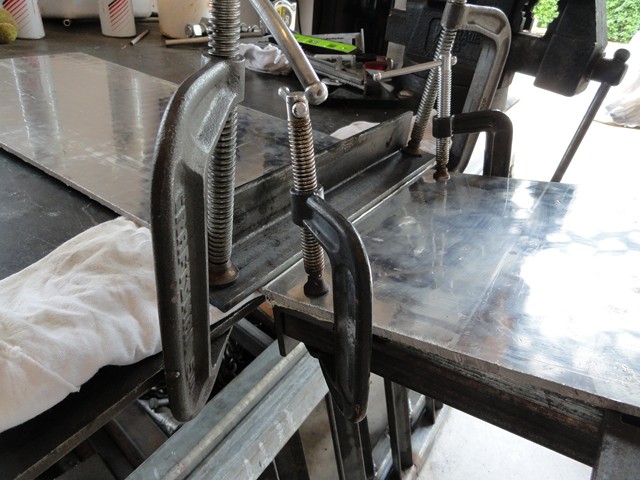
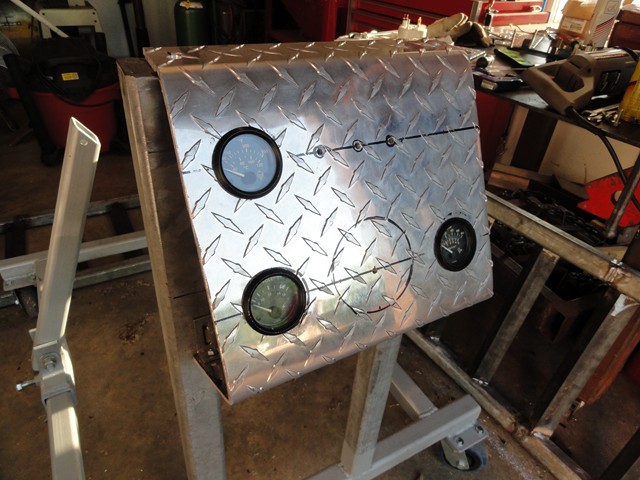
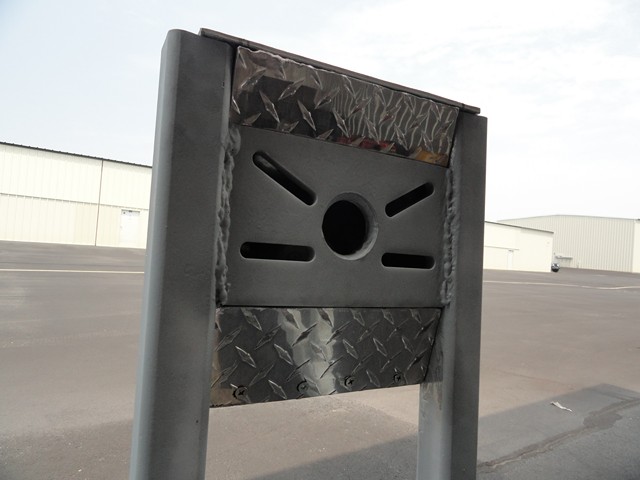
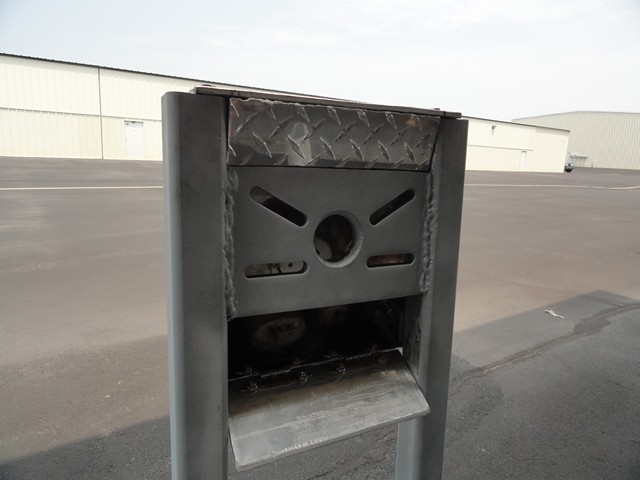
Using diamond plate from the scrap yard, I built a housing to hold the switches and gauges. I cut a small groove in the aluminum to help it bend and then jerry rigged the metal table to act as a break. I used one piece of angle iron and c-clamps to hold down the diamond plate to the table and then used four other pieces of metal, two horizontal and two vertical, to support the part that is getting bent. With simple leverage from the two vertical bars the diamond plate bent very easily.
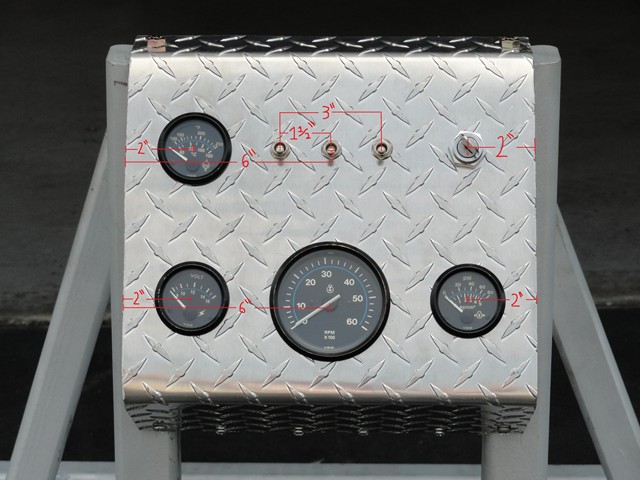
Once I determined the shape, I measured and drilled holes for the gauges and switches. I used the gauges and switches from our old 1975 boat rather than having to buy new ones. The only thing I bought as far as switches go was the ignition switch which I purchased off Amazon for $10.
To mount the gauge housing, I drilled and tapped holes in the 2" by 2" for the bottom mount. For the top mount, I welded a plate on the top of the 2" by 2" and tapped threads into it.

In order to make the housing more flush looking, I made aluminum triangles to cover up the side. I TIG welded two spot welds on the inside to hold them in position.
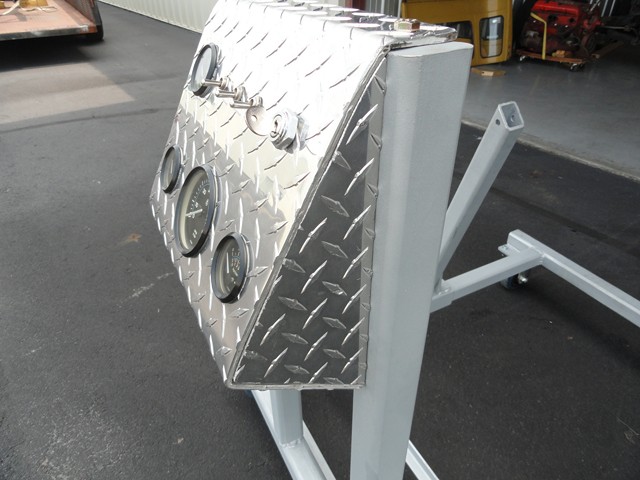
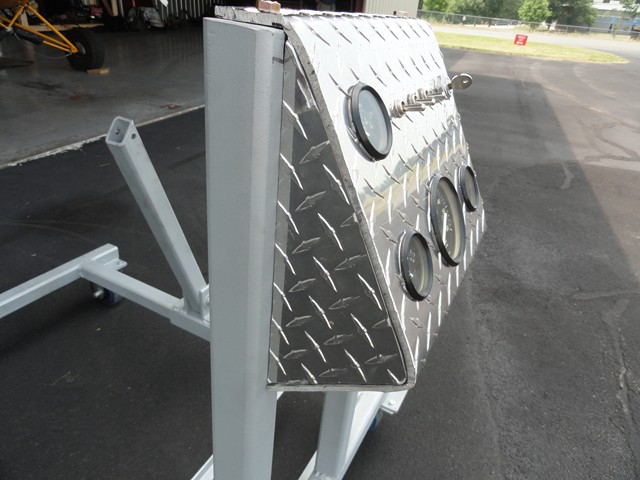
Since I will need access to the gauges and the engine mounting bolts, I installed a small door on the bottom with hinges that will allow me access the inside without having to remove everything. This will come in handy when hooking up the gauges and moving the motor mounts.
To attach the rear of the engine to the stand, I made four braces. In order for the heads of the bolt not to spin while being tighten, I installed carriage bolts that I grinded down so that they would fit perfectly in the slots without rotating. I also installed multiple washers in between the mounting plate and the braces to leave room for the bolts that will attach to the rear of the motor.
For now that is it but I will be updating this article later once I determine the dimensions for the radiator support.
Questions:
Where did you get the supports for the engine mount area?